
Understanding Vapor Barrier Installation
What is a Vapor Barrier?
A vapor barrier is a material designed to prevent moisture from passing through walls, floors, and ceilings. Commonly made of plastic or foil sheets, it acts as a shield against water vapor that can infiltrate building structures. This is particularly crucial in areas like crawl spaces, where moisture can lead to mold, wood rot, and structural damage. Understanding its role in maintaining a dry and healthy environment is essential for any property owner.
Importance of Vapor Barrier Installation
Installing a vapor barrier is vital for several reasons. First, it helps in controlling humidity levels, significantly reducing the risk of mold growth which can have adverse health effects. Second, it protects the integrity of the home’s structure by preventing moisture-induced damage to insulation and foundational elements. Lastly, a well-installed vapor barrier contributes to energy efficiency, making heating and cooling less costly. Therefore, the significance of proper Vapor Barrier Installation cannot be overstated.
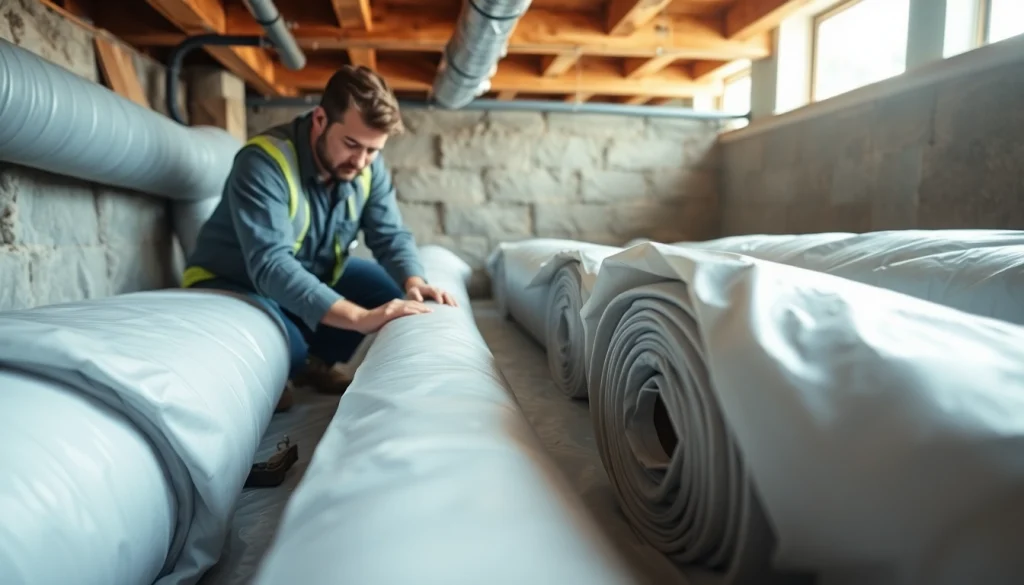
Key Materials for Vapor Barrier Installation
Choosing the right materials is crucial for an effective vapor barrier. The most commonly used materials include polyethylene sheets, which vary in thickness (typically between 4 to 20 mils). Thicker polyethylene offers better durability, but installation considerations such as flexibility and cost should also be taken into account. Additionally, foil-faced insulation boards can serve as a vapor barrier while providing insulation, making them a dual-purpose option that can enhance energy efficiency. Make sure to select materials that comply with local building codes for optimal performance.
Preparing for Vapor Barrier Installation
Assessing the Crawl Space
Before proceeding with the installation, a comprehensive assessment of the crawl space is essential. Look for signs of existing moisture issues, such as dampness, mold, and water stains. Evaluating ventilation levels is also critical, as higher humidity levels can compromise the effectiveness of the vapor barrier. Additionally, any existing damage to the structure, insulation, or plumbing should be addressed before installation to ensure a solid foundation for the vapor barrier.
Choosing the Right Vapor Barrier Material
Selecting the appropriate vapor barrier material depends on several factors such as local climate, environmental conditions, and intended use. For regions with high humidity, opting for thicker polyethylene barriers or foil-faced insulation may be more effective. Always consider the material’s permeability rating, as lower permeability indicates better performance in preventing moisture infiltration. Consulting with an experienced contractor can help in making an informed decision that best suits your needs.
Essential Tools for Installation
The installation process requires a few essential tools for a successful outcome. Key tools include a utility knife for cutting the vapor barrier material, a staple gun or adhesive for securing it in place, and a measuring tape for accurate measurements. Additionally, having a brush or roller for sealing the seams and a pair of gloves to protect your hands is advisable. Organizing these tools before commencing can streamline the installation process.
Step-by-Step Vapor Barrier Installation Guide
Preparing the Crawl Space
After conducting a thorough assessment, it is time to prepare the crawl space. This involves cleaning the area to remove debris, mold, or any standing water that could compromise the moisture barrier. Repair any damage found during the assessment. Next, ensure proper drainage and ventilation in the crawl space to support the effectiveness of the vapor barrier installation. This step is integral in creating an ideal environment for the barrier to function effectively.
How to Properly Install the Vapor Barrier
Begin by rolling out the vapor barrier across the crawl space floor. Make sure it overlaps with the walls and other sections by at least 12 inches. Use adhesives or staples to secure the edges, ensuring there are no gaps that can allow moisture to enter. If the vapor barrier is being installed on walls, it should be applied similarly with seams adequately sealed to prevent moisture passage. Proper installation technique directly influences the long-term effectiveness of the vapor barrier.
Sealing and Insulation Practices
Sealing the edges and seams of the vapor barrier is crucial in creating a continuous moisture shield. Use a waterproof sealant specifically designed for vapor barriers, applying it generously along seams and edges to ensure a complete seal. Insulation can be added over the vapor barrier for added efficiency, particularly if it is a heated space. Follow manufacturer guidelines for any additional insulation to maintain compliance and maximize the vapor barrier’s effectiveness.
Common Challenges in Vapor Barrier Installation
Addressing Moisture Problems
One of the main challenges during installation is addressing existing moisture problems. Before installing a vapor barrier, it’s crucial to rectify any ongoing moisture issues. This may include fixing leaks, ensuring proper drainage away from the home, and utilizing dehumidifiers as necessary. Addressing these issues beforehand will contribute to the overall success and longevity of the vapor barrier.
Dealing with Existing Damage
If moisture damage or mold is found during your initial assessment, it’s vital to rectify these problems before proceeding with installation. This may involve repairing or replacing damaged wood, treating mold with appropriate solutions, and ensuring a clean surface for the vapor barrier. Ignoring existing damage may lead to further complications down the line, undermining the vapor barrier’s effectiveness.
Common Mistakes to Avoid
Numerous mistakes can occur during vapor barrier installation that can compromise its effectiveness. Some common errors include not overlapping seams adequately, failing to seal edges properly, and neglecting to assess existing moisture issues before installation. Avoid rushing through the installation process; each step is essential for optimal performance. Taking the time to ensure everything is done correctly will save you from costly repairs in the future.
Maintaining Your Vapor Barrier
Regular Inspection Guidelines
Once your vapor barrier is installed, regular inspections are necessary to ensure it is functioning properly. A good rule of thumb is to inspect the crawl space at least once a year. Look for signs of moisture intrusion, damage, or any deterioration of the barrier itself. Early detection can prevent more extensive damage from occurring, making this preventive practice crucial for long-term maintenance.
Signs of Vapor Barrier Failure
Several indicators can suggest your vapor barrier is not performing effectively. Look for persistent dampness, mold growth, or unusual odors in the crawl space. If insulation appears wet or rotten, this is also a strong sign of vapor barrier failure. Being proactive about recognizing these signs can mitigate further damage and maintain a healthy environment in your home.
Long-term Benefits of Proper Installation
Proper installation and maintenance of a vapor barrier offer numerous long-term benefits. These include improved energy efficiency, a significant reduction in mold and mildew, and enhanced comfort within the home. Additionally, a well-installed barrier protects the structural integrity of your home, maintaining its value over time. Investing time and effort into the installation process pays dividends in the form of fewer repairs and a healthier living environment.
Frequently Asked Questions
1. How thick should a vapor barrier be?
A vapor barrier ideally should be between 6 and 20 mils thick, with thicker options providing better durability and moisture resistance.
2. Where should a vapor barrier be installed?
Vapor barriers should be installed in crawl spaces, basements, and areas that are prone to high humidity to prevent moisture infiltration.
3. Can I install a vapor barrier myself?
Yes, a vapor barrier can be installed as a DIY project if you follow detailed instructions and take necessary precautions for safety and accuracy.
4. How often should a vapor barrier be inspected?
It is recommended to inspect your vapor barrier once a year for any signs of damage or moisture intrusion to ensure it’s functioning correctly.
5. What happens if a vapor barrier fails?
If a vapor barrier fails, it can lead to excess moisture, mold growth, and potential structural damage, making timely inspections crucial.